Best Way for Students to Upload Assignments in Wordpress
This guide is designed to assistance you build a Virtual Classroom website that will enable you to distribute and collect assignments, facilitate discussion, and build a community for your grade without being together in person!
In this guide we will encompass the post-obit topics:
- Choose a theme and website construction
- Prepare up means to facilitate learning and interaction
- Maintain a condom and effective online classroom environment

Table of Contents
Before you lot go started, it can be helpful to think about how yous'd like to structure your website. What information do you need to share with your grade? Do you need to facilitate discussion or collect assignments? This will help you decide what pages to add together and how to ready your homepage.
Let's get started!
The Basics
Cull a Theme
The theme used in our demo is chosen Stratford. This theme was selected because it has a sticky header that remains at the top of the screen as you roll downwards.
Other great options include the p2 theme, which allows for front-end posting and commenting, or Hever, one of our most popular themes.
You tin modify your theme at any time and the content yous created will exist preserved in the new theme.
Configure Privacy Settings
By default, all new websites at WordPress.com will be individual until they are launched. During this time, you are free to work on your website without beingness viewable by the public.
Privacy settings decide who can view your website. To manage your privacy settings, go to My Site(due south) → Settings and await for Privacy on the General tab. Once your website is launched, you will have the option to set your privacy settings to Public or Individual.
In that location are several options for setting up a private website where simply your members (or students) can access certain content.
Creating your Content
Your homepage can exist prepare to either evidence a listing of your latest blog posts or to evidence a static page. How you set upward your homepage depends on how yous plan to use your website.
In the demo site, nosotros built a static folio that also displayed the most recent blog posts.
Your site is made upward of Blog Posts and Pages.
- Posts are for content that is added frequently. These can be used for lessons, messages to your students, or assignments. Posts will appear on a blog feed page with the about recently published mail service shown at the peak.
- Pages are for static content. Pages can be used to publish content such equally an about or contact page, welcome message, instructions, or even assignments.
Content is created through theMy Site → Pages orMy Site → Posts section of your dashboard.
At present that we've covered the basics, let's dive into some additional features.
↑ Table of Contents ↑
Categorizing your Content
Categories let you to link your students to a specific collection of content, like lessons and discussions, equally we've done in the demo.
We've categorized weblog posts and then added those categories to the site menu and buttons on the main page for easy access.
You can also use categories if y'all're managing more than ane class or accept other logical collections of content.
Categories are created nether My Site(s) → Settings → Writing. Then, categories are assigned to individual posts equally you edit the mail.

↑ Tabular array of Contents ↑
Adding Lessons and Assignments
Now that we have the basic structure of your website set, you lot can start calculation your outset lessons or assignments.
In this tutorial, we are using posts for assignments and lessons to assign them to different categories. Posts are also a great option because you tin can have your students sign up to receive email notifications when a new post is published, then they're always up-to-date on the latest assignments.
Calculation Videos
Video can be a highly personal and efficient fashion to communicate with your class. This might exist in the grade of a recorded lesson or lecture, instructions nearly the assignment, or a personal bulletin.
📌
To upload video files directly to WordPress.com, your site volition demand a WordPress.com Pro program or a legacy Premium, Business, or eCommerce plan. The free and legacy Personal plans support video embeds from YouTube, Vimeo, and other free video hosting services.
Adding Documents
Calculation documents is a great fashion to distribute class notes, specific assignments, and other relevant materials.
WordPress.com supports the upload of many types of mutual file types. You can see a full list here.
A File block can be used to upload a file and create a download link to information technology.

Embedding PDF Files
PDF files can exist embedded and viewable directly on the website. To brandish an embedded PDF, add a URL to the PDF file directly into a paragraph block and the editor volition exercise the remainder.
↑ Table of Contents ↑
Additional Features
Additional features used throughout the demo site include:
- A Contact page with a contact form and the Business hours block used as office hours
- A Countdown block, which serves equally a slap-up visual reminder of a due date for an consignment
- A Search block predominantly placed on the habitation page
- A Google Calendar on the Schedule folio, a not bad tool for reminding students of upcoming events and due dates
↑ Table of Contents ↑
Calculation Students
One time your website is gear up to go, yous can allow access to your students. If your website is public, this is equally simple as sharing your website address with your students without whatever additional steps.
New Mail Notifications for Students
Your students tin can follow your website and receive notifications each time a new post is published. This is a great mode for students to keep up with whatever new assignments, news, or special messages.
On the demo site's home folio, nosotros've added a Subscribe block to encourage students to subscribe to the site.

For full instructions on following websites, you lot tin can share this support page with your students.
Adding Students as Viewers to a Individual Website
If your website needs to remain private, you lot can grant access to your students past adding them every bit Viewers. Equally viewers, they will non be able to add or alter any content. They will be able to annotate on posts.
To add viewers to your private site, open My Site(s) → Users . Once there, click the +Invite push. From here, you tin enter upwardly to ten email addresses, choose the Viewer role, write a custom message, and send the invitation. To view and manage your viewers, visit My Site(due south) → Users → Viewers.

Allowing Students to Write Content
If you lot would similar to let students to write posts or pages, this is possible past choosing a unlike part. Contributors and Editors have admission to write content, just do not have access to whatever other website settings.
- Contributors tin write and edit their own posts, merely cannot publish.
- Authors tin can write, edit, and publish their own posts.
User roles can be changed at whatsoever time.
📌
To view your private website, each student will demand to gear up a WordPress.com account. For full instructions on adding users and user roles, see this support page.
↑ Table of Contents ↑
Moderating Discussions
If you'd like your students to interact with each other, yous tin can set up upward commenting on specific posts. For example, in our demo site, we've turned commenting on for the Discussion posts only.
When assuasive commenting, you'll want to make sure yous have reviewed your moderation settings. You can gear up information technology upwardly then only people who take joined your site can comment, or that a annotate must exist approved past a site admin earlier it will appear on the site.
↑ Table of Contents ↑
Collecting Payments for your Classes
The Payments feature allows you to create one-time and recurring payments. Yous tin combine Payments with the Premium Content block to restrict access to content based on a subscriber's membership level.
For example if you wanted to offer paid tutoring sessions, you lot could create a Payments button for a once purchase of a one hour session, like in the case below:

The first time you insert the Payments block, you lot will take to connect or prepare upward a Stripe business relationship. We partner with Stripe to make certain payments cease upwards safely in your banking concern business relationship.
Once Stripe is set, y'all tin add your showtime subscription. Choose a renew interval (a calendar month or a year), championship of your course, and of form – the price:
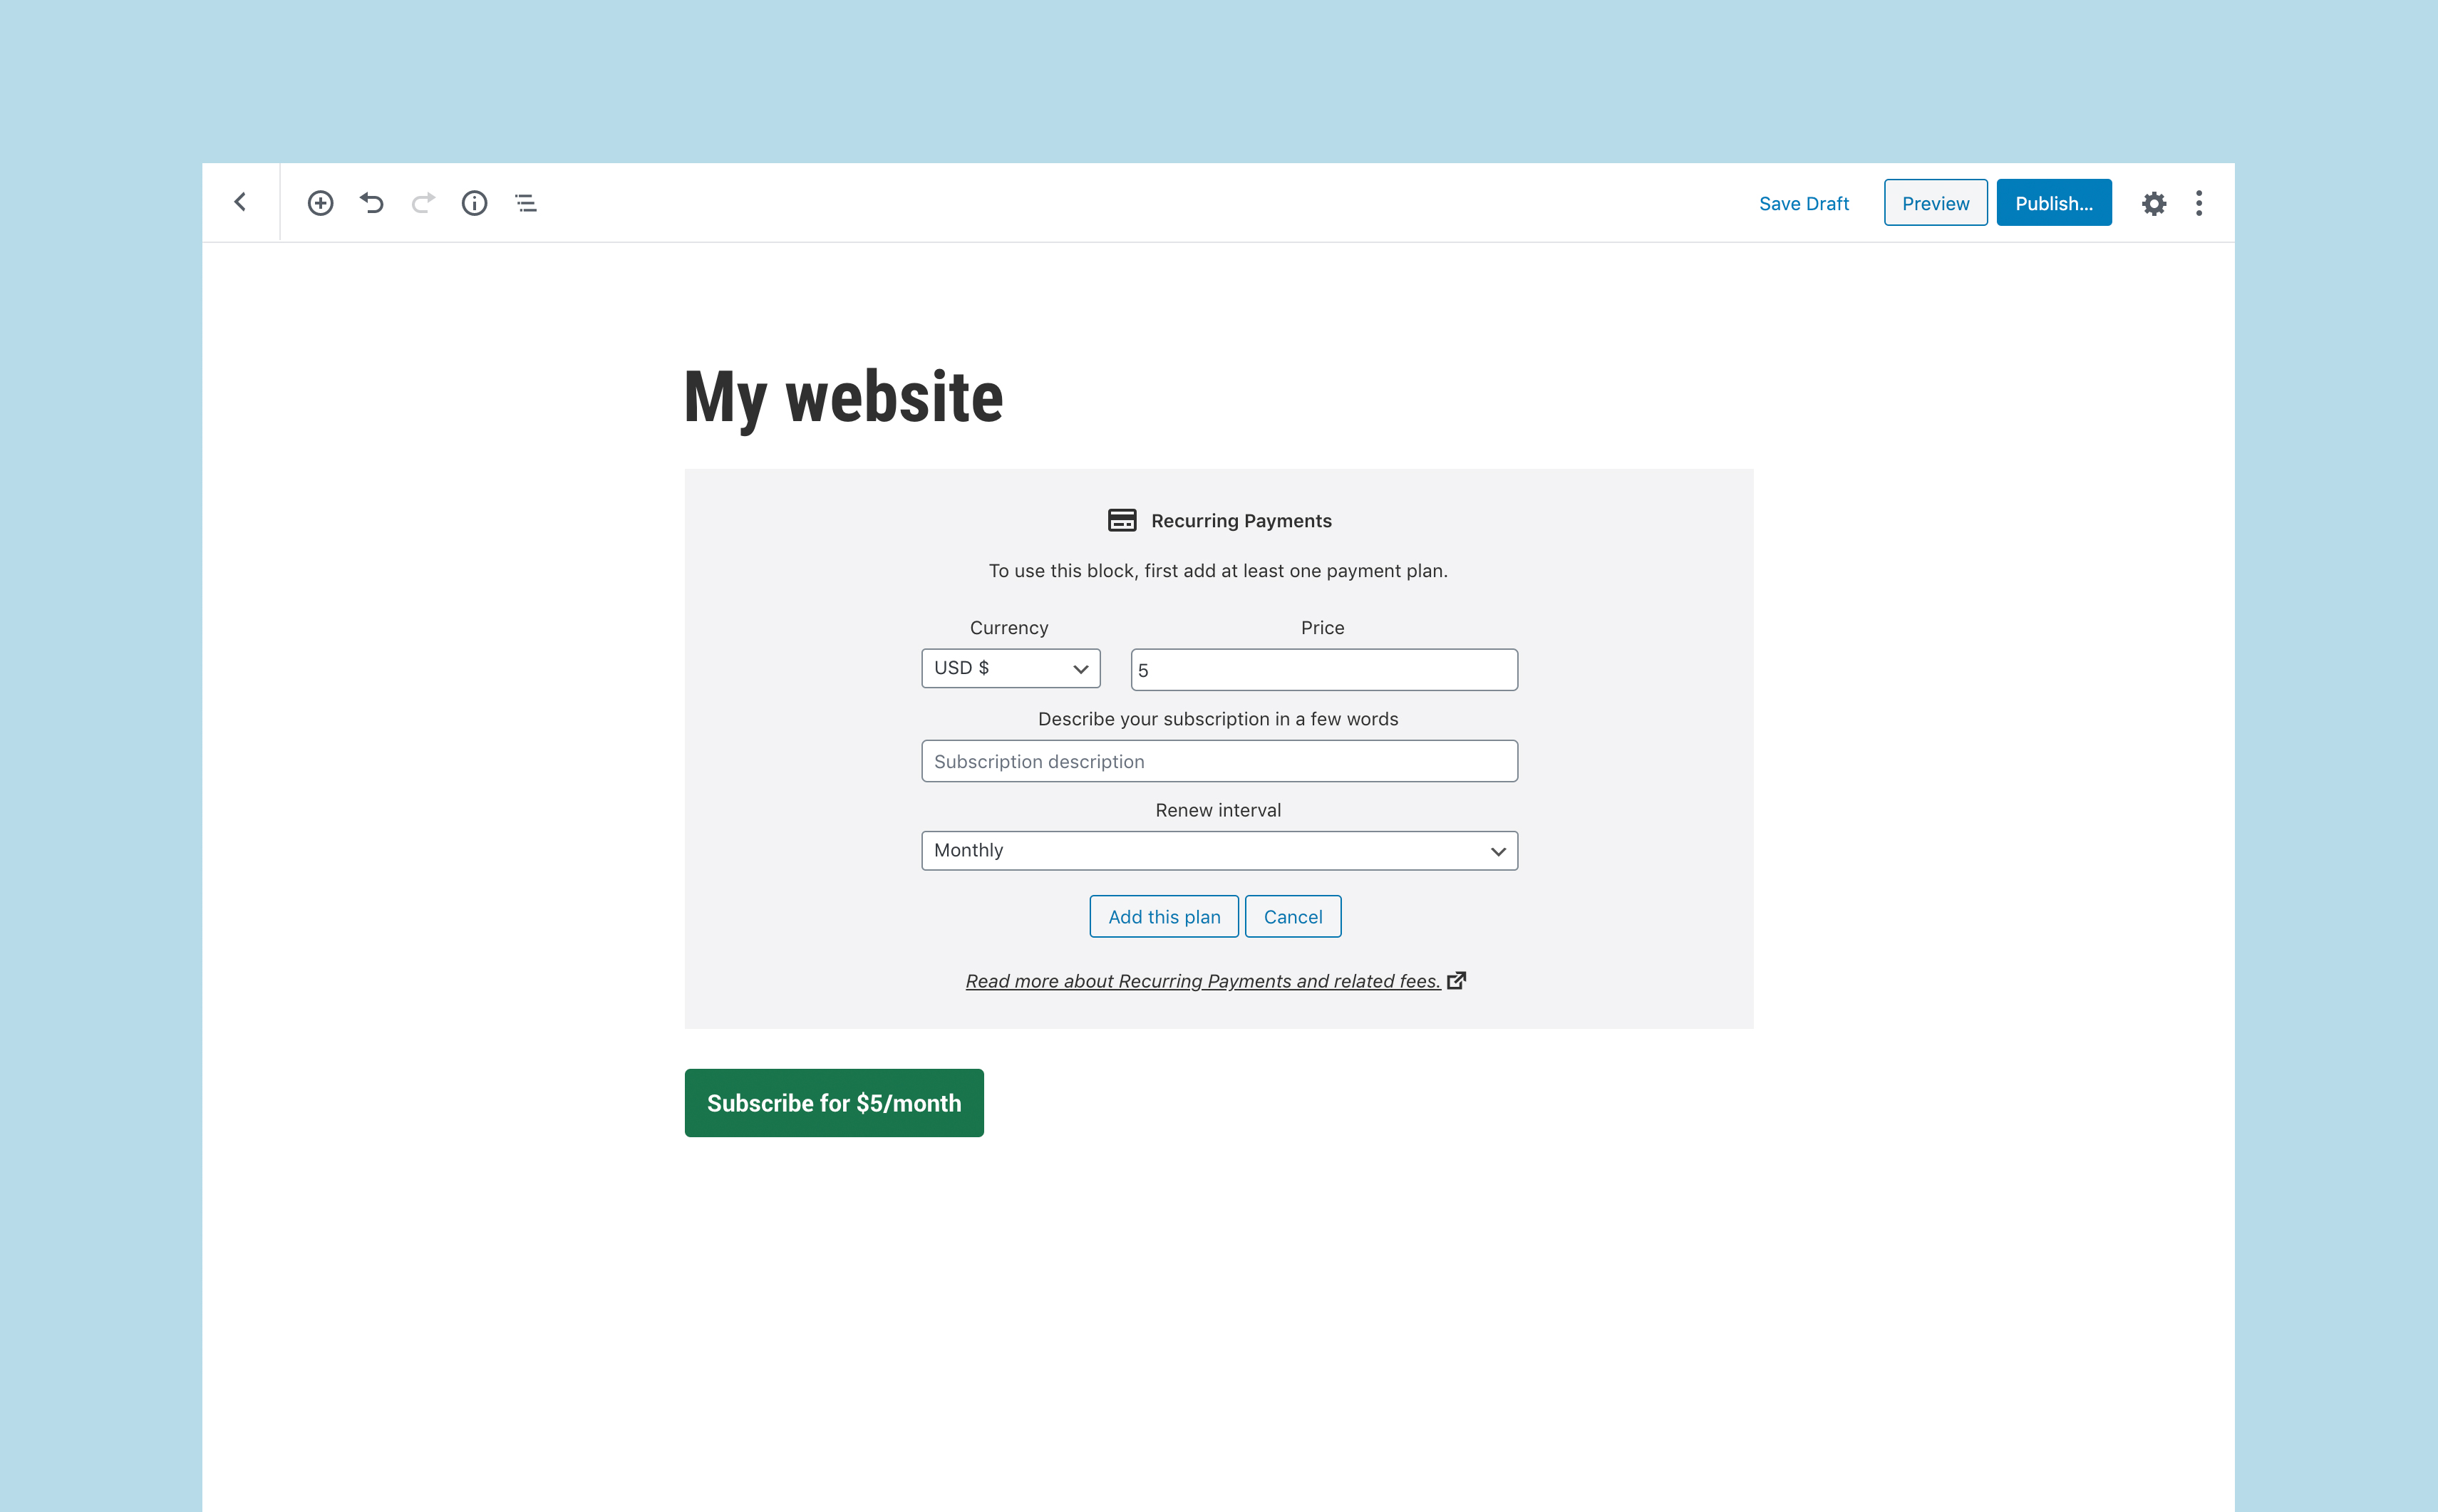
In one case you publish the page, your students will be able to sign upward and they will be charged automatically every month or a yr.
↑ Table of Contents ↑
Conclusion
That's it! You've successfully created and gear up your Virtual Classroom website. Congratulations!
Go on in heed that y'all can make changes at any time to your website. To notice aid, click the blueish question marker in the lower right of your dashboard. Hither you can find help from our documentation or go in touch with support directly. Visit our back up documentation at wordpress.com/support or get in touch with our Happiness Engineers and we'll exist happy to aid!
Source: https://wordpress.com/support/tutorials/build-a-virtual-classroom-website-tutorial/
0 Response to "Best Way for Students to Upload Assignments in Wordpress"
Postar um comentário